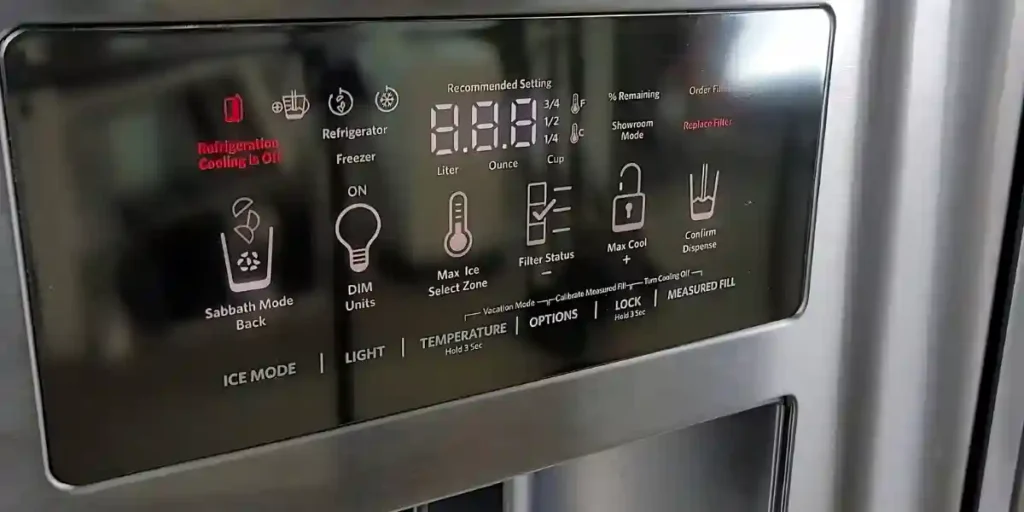
Is your KitchenAid refrigerator feeling a bit under the weather after a power outage? Don’t worry; I’m here to help you fix the cool conundrum!
Let’s embark on a chilly expedition to uncover the secrets of getting your fridge back to its frosty best.
We’ll troubleshoot and unravel the mystery behind the cooling powers.
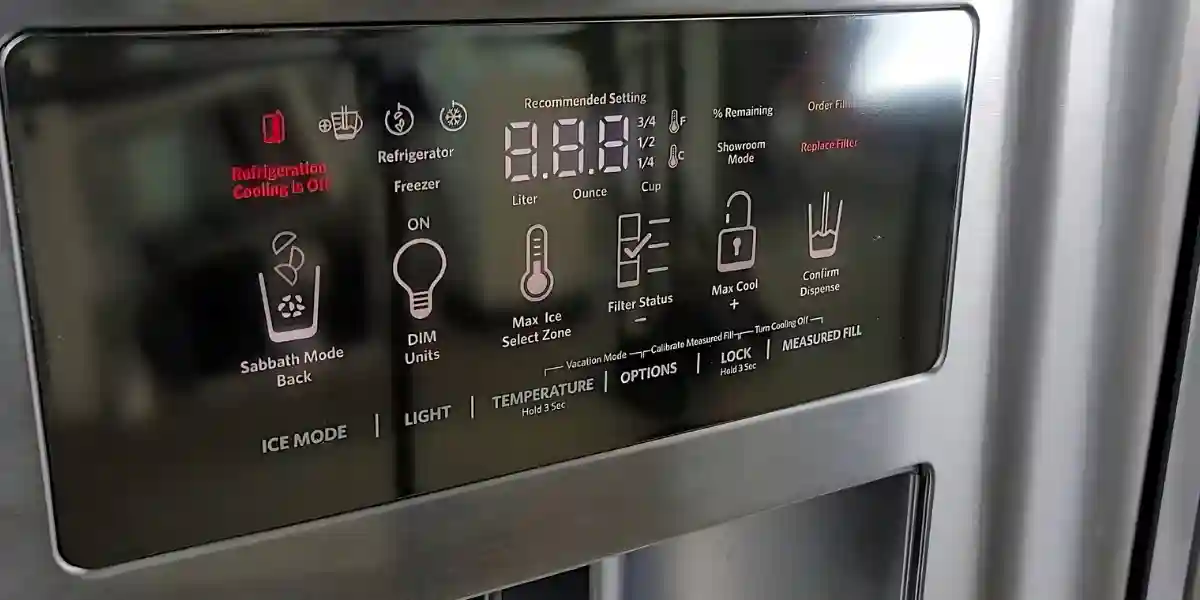
Kitchenaid Refrigerator Not Cooling After Power Outage
If your KitchenAid refrigerator isn’t cooling after a power outage, there’s a simple fix.
Unplug it for 5-10 minutes, then plug it back in to reset the compressor. Make sure it’s plugged in, and the breaker switch is on.
Adjust the thermostat between 33ºF – 40ºF. If the issue persists, check for a flipped breaker, faulty circuit board, or problems with condenser coils, thermistors, or start relays.
Possible Causes and Solutions for KitchenAid Refrigerator Not Cooling After Power Outage
Check the Power Supply
The first step to troubleshooting a KitchenAid refrigerator that is not cooling after a power outage is to check the power supply.
Ensure the refrigerator is properly plugged in and the outlet is functioning correctly.
You can do this by plugging in a different appliance or device to see if it works. If the outlet is not working, try plugging the refrigerator into a different outlet.
If the refrigerator still does not turn on, there may be an issue with the power cord or the refrigerator’s electrical system.
Reset the compressor:
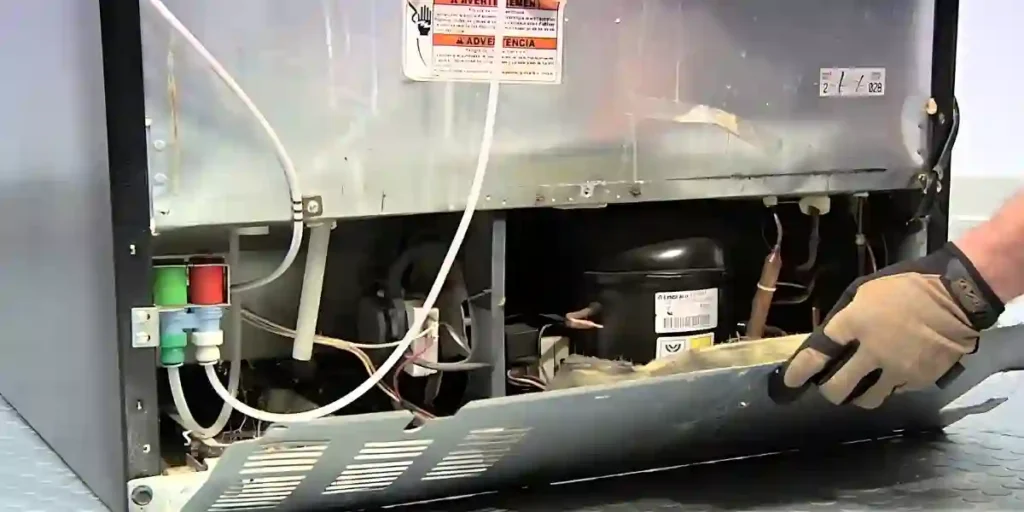
The compressor is like the engine of your refrigerator, responsible for circulating refrigerant and cooling the air.
After a power outage, it may get stuck and stop running. To fix this, unplug your refrigerator from the power outlet and wait 5-10 minutes.
Then, plug it back in. This simple reset can often get the compressor running again and restore proper cooling.
To check the compressor, first, unplug the refrigerator and locate it. The compressor is usually located at the back of the refrigerator.
Listen for any unusual noises coming from it. If it is making a loud noise or not functioning properly, it may need to be replaced.
Check the thermostat settings:
If the power supply is not the issue, the next step is to check the thermostat settings on your KitchenAid refrigerator.
The thermostat controls the temperature inside the refrigerator and freezer compartments.
Ensure the thermostat is set to the correct temperature, usually between 37-40°F for the refrigerator and 0°F for the freezer.
If the thermostat is not working, it may need to be replaced.
Check the Power Outage Indicator
If your KitchenAid refrigerator is equipped with a power outage indicator, it can provide valuable information about the previous power interruption.
Check the control panel display for any “Power Outage” message. If displayed, touch any button to stop the alert tone, and touch any button again to turn off the power outage icon.
Clean the condenser coils:
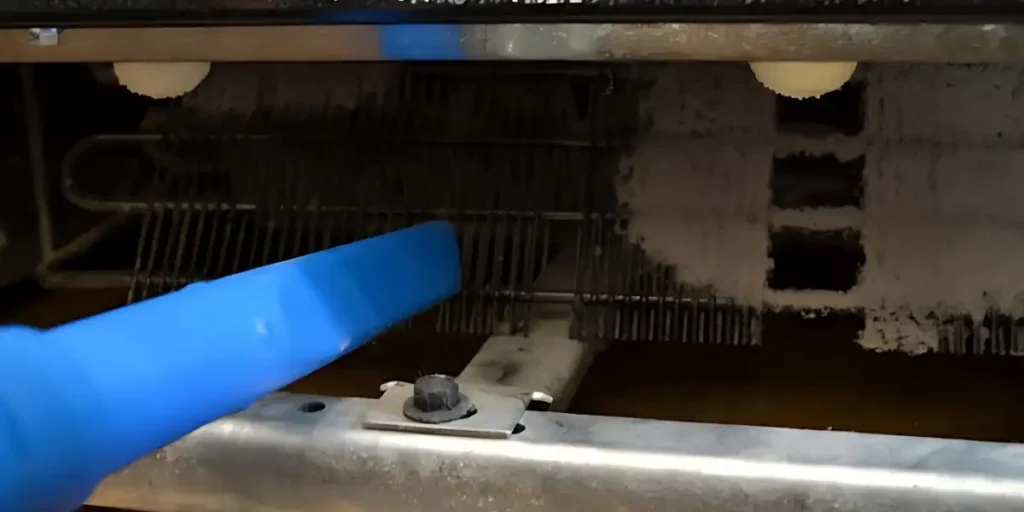
The condenser coils on your refrigerator are responsible for removing heat from the refrigerant.
Over time, these coils can become dirty or clogged with dust and debris, which can cause your refrigerator to stop cooling properly.
To clean the condenser coils, first, unplug the refrigerator and locate them. They are usually located at the back or bottom of the refrigerator.
Use a vacuum or brush to remove any dirt or debris from the coils.
Check the Evaporator Fan
The evaporator fan circulates air over the evaporator coils to cool them down. If the fan is not working, your refrigerator will not cool properly.
To check the fan, first, unplug the refrigerator and locate it.
The fan is usually located inside the freezer compartment behind the back panel. Make sure it is free of any obstructions and that it is spinning freely.
If it is not working, it may need to be replaced.
Inspect the door gasket:
The door gasket is a rubber seal that ensures a tight closure when the refrigerator door is shut.
If it is damaged or dirty, it may not seal properly, causing cool air to escape and warm air to enter.
Close the refrigerator door and carefully examine the gasket. If you notice any gaps or light coming from the sides or bottom, it indicates that the gasket needs to be replaced.
A new gasket will create a proper seal, preventing cool air leakage.
Verify the start relay:
The start relay is a device that helps kick-start the compressor. If it is faulty or damaged, the compressor won’t start, and your refrigerator won’t cool effectively.
To address this issue, it’s recommended to contact a technician who can inspect the start relay and replace it if necessary.
Reset the overload protector:
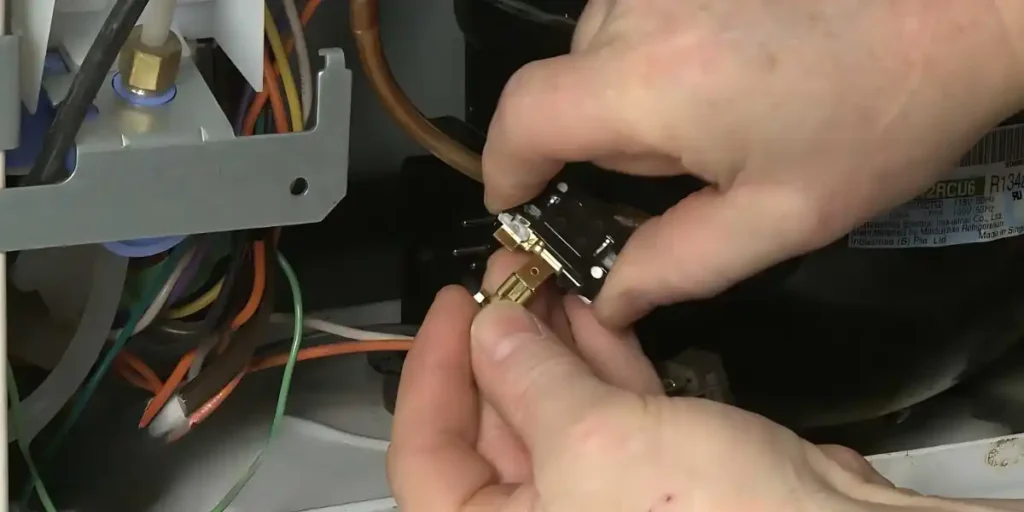
The overload protector is a safety feature that shuts off power to the compressor if it becomes too hot.
Following a power outage, it may trip and prevent the compressor from running.
To resolve this, unplug your refrigerator and wait for approximately 30 minutes. This allows the overload protector to reset itself.
After the waiting period, plug your refrigerator back in and check if the cooling resumes.
Check the fan motor:
The fan motor is responsible for circulating cold air inside the refrigerator, ensuring uniform cooling.
If the fan motor is not working, the air won’t circulate properly, resulting in inadequate cooling.
Open the fridge door and listen for the sound of the fan running. If you don’t hear it, contact a technician to inspect the fan motor and replace it if necessary.
They possess the necessary skills to handle such repairs safely.
Defrost the evaporator coils:
Evaporator coils are located inside the fridge and play a vital role in cooling the air.
If they become frozen due to a malfunction, they won’t be able to cool the air properly, leading to poor cooling performance.
Unplug your refrigerator and leave the doors open for a few hours to address this. This allows the coils to defrost naturally. If the issue persists after defrosting,
Address low refrigerant levels:
Refrigerant is the gas that helps cool the air inside your refrigerator. If there is a leak or the refrigerant level is low, your fridge won’t be able to cool effectively.
Fixing this issue requires the expertise of a professional technician. They can identify the leak, repair it, and recharge the refrigerant to the correct level. Contact a reputable appliance repair service to resolve low refrigerant issues.
Check the Run Capacitor
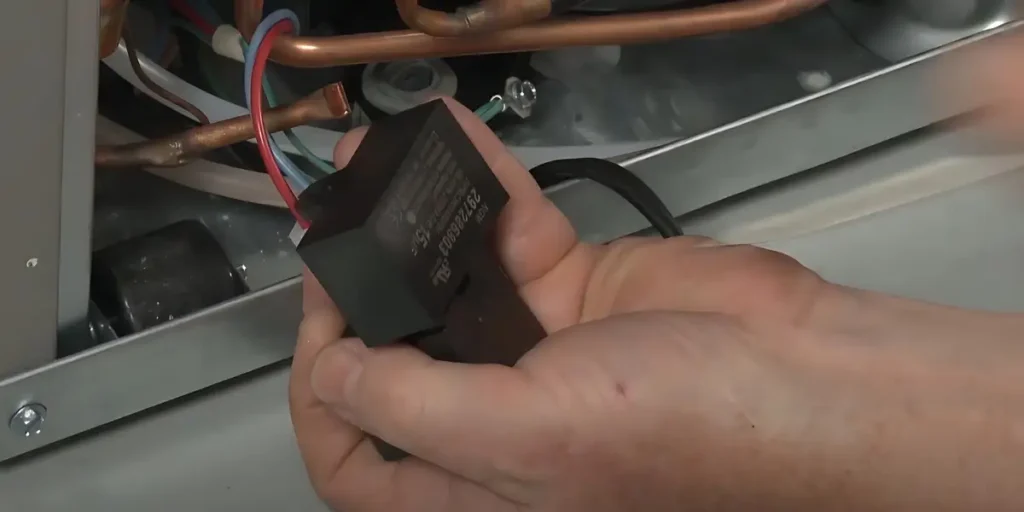
The run capacitor helps start and run the compressor. If it is not working, the compressor will not run, and your refrigerator will not cool properly. The run capacitor is usually located on or near the compressor.
Address control board issues:
The control board is the electronic component that regulates various functions of your refrigerator, including temperature control.
If it becomes defective or damaged, it can disrupt the cooling process.
However, fixing or replacing the control board is a complex task that a qualified technician should handle.
It’s recommended to contact an appliance repair service with expertise in handling control board repairs to ensure the proper functioning of your refrigerator.
Maintaining Your KitchenAid Refrigerator for Optimal Cooling
Check Condenser Coils Periodically
The condenser coils on your refrigerator are responsible for removing heat from the refrigerant.
Over time, these coils can become dirty or clogged with dust and debris, which can cause your refrigerator to stop cooling properly.
To clean the condenser coils, first, unplug the refrigerator and locate them. They are usually located at the back or bottom of the refrigerator.
Use a vacuum or brush to remove any dirt or debris from the coils.
Check the Door Seals
The door seals on your refrigerator keep the cool air inside and prevent warm air from entering.
Over time, these seals can become worn or damaged, which can cause your refrigerator to not cool properly.
To check the door seals, close the door on a piece of paper and try to pull it out. If the paper comes out easily, the seals may need to be replaced.
Keep the Refrigerator Clean

Regularly cleaning the inside of your refrigerator can help it run more efficiently. Make sure to wipe up any spills or messes as soon as they happen.
It is also a good idea to remove any expired or spoiled food to prevent odours and bacteria from building up.
Check the Temperature Settings
Ensure your refrigerator’s temperature settings are set to the correct temperature. The ideal temperature for the refrigerator is between 37-40°F, and the freezer should be set to 0°F.
Allow for Proper Airflow
Make sure there is enough space around your refrigerator for proper airflow. The refrigerator should be at least 2 inches from the wall and other objects.
It is also important not to overfill your refrigerator, as this can block airflow and cause it not to cool properly.
Replace the Water Filter
If your KitchenAid refrigerator has a water dispenser or ice maker, replacing the water filter regularly is important. This will help ensure that the water is clean and fresh-tasting.
Check the Evaporator Fan
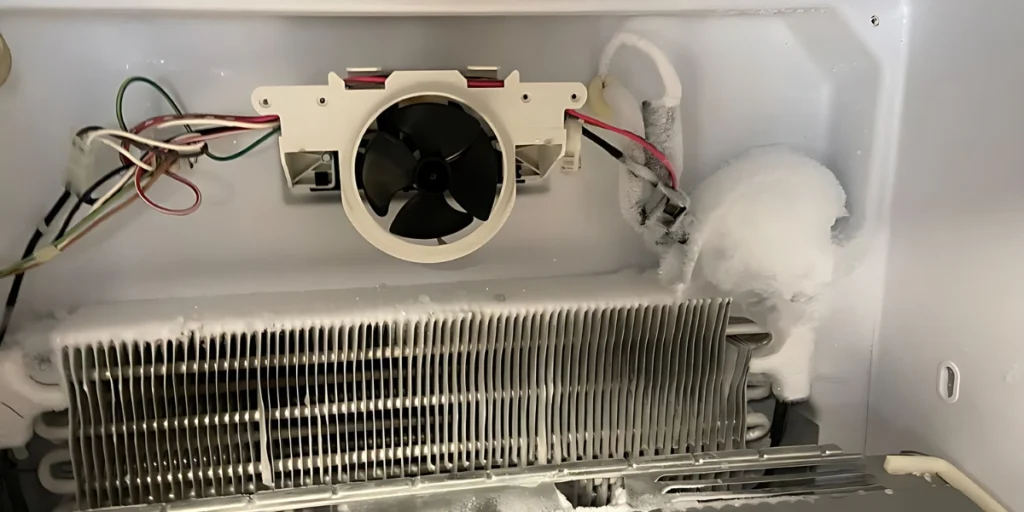
The evaporator fan circulates air over the evaporator coils to cool them down. If the fan is not working, your refrigerator will not cool properly.
To check the fan, first, unplug the refrigerator and locate it.
The fan is usually located inside the freezer compartment behind the back panel.
Make sure it is free of any obstructions and that it is spinning freely. If it is not working, it may need to be replaced.
Keep The Refrigerator Organized
A cluttered refrigerator will not cool as effectively as an organized one. Make sure to keep the shelves and drawers organized and free of food and debris.
Avoid Overloading The Refrigerator.
Overloading the refrigerator can prevent the air from circulating properly, which can lead to decreased cooling efficiency.
Do Not Open The Refrigerator Door Too Often.
Opening the refrigerator door allows warm air to enter, which can make the refrigerator work harder to cool. Try to open the refrigerator door as few times as possible.
FAQs
What Should I Do If My KitchenAid Refrigerator Is Not Cooling After A Power Outage?
Start by checking if the refrigerator is plugged in properly and the breaker switch is on. Adjust the thermostat between 33ºF – 40ºF. If the problem persists, it could be due to a flipped breaker, faulty circuit board, or issues with condenser coils, thermistors, or start relays.
How Can I Reset The Compressor Of My KitchenAid Refrigerator?
Unplug the refrigerator from the power source to reset the compressor for 5-10 minutes. Then, plug it back in. This should initiate the compressor and restore cooling functionality.
What Could Be Causing My KitchenAid Refrigerator To Not Cool After A Power Outage?
Aside from a reset, other potential causes include a flipped breaker, malfunctioning circuit board, or problems with condenser coils, thermistors, or start relays. It’s best to troubleshoot these components or seek professional assistance if needed.
Should I Check The Condenser Coils If My KitchenAid Refrigerator Is Not Cooling?
Yes, dirty or clogged condenser coils can impede cooling efficiency. Regularly clean the coils located at the back or underneath the refrigerator using a brush or vacuum cleaner. This helps to maintain optimal cooling performance.
How Can I Maintain My KitchenAid Refrigerator To Prevent Cooling Issues?
Ensure proper airflow around the refrigerator, clean the condenser coils regularly, and avoid overloading the fridge. Additionally, keep the door sealed tightly and maintain the recommended temperature settings. Regular maintenance helps prevent cooling problems.
Conclusion
Don’t let a power outage ruin your KitchenAid refrigerator’s cooling. Simply unplug it for a few minutes to reset the compressor and check the power supply.
Adjust the thermostat and troubleshoot possible issues like flipped breakers or faulty components. Regular maintenance and proper care will ensure optimal cooling performance.

