How To Find Low Side Of Refrigerator Compressor? Quick Guide
We may earn affiliate fees for purchases using our links (at no additional cost to you).
Are you tired of dealing with a refrigerator that’s not cooling properly?
Have you ever wondered how to identify the low side of your refrigerator compressor?
Using practical tips, we’ll help you pinpoint your compressor’s low side in this article about refrigeration systems.
Say goodbye to guesswork and hello to a properly functioning refrigerator. Let’s get started!
How to Find the Low Side of a Refrigerator Compressor?
Here is a step-by-step guide for finding the low side of the refrigerator compressor.
Gather the Necessary Tools
To successfully find the low side of a refrigerator compressor, you will need a few essential tools.
Ensure you have a pair of safety goggles, insulated gloves, a refrigerant pressure gauge, and a flashlight.
These tools will help you navigate the process safely and accurately.
Locate the Compressor
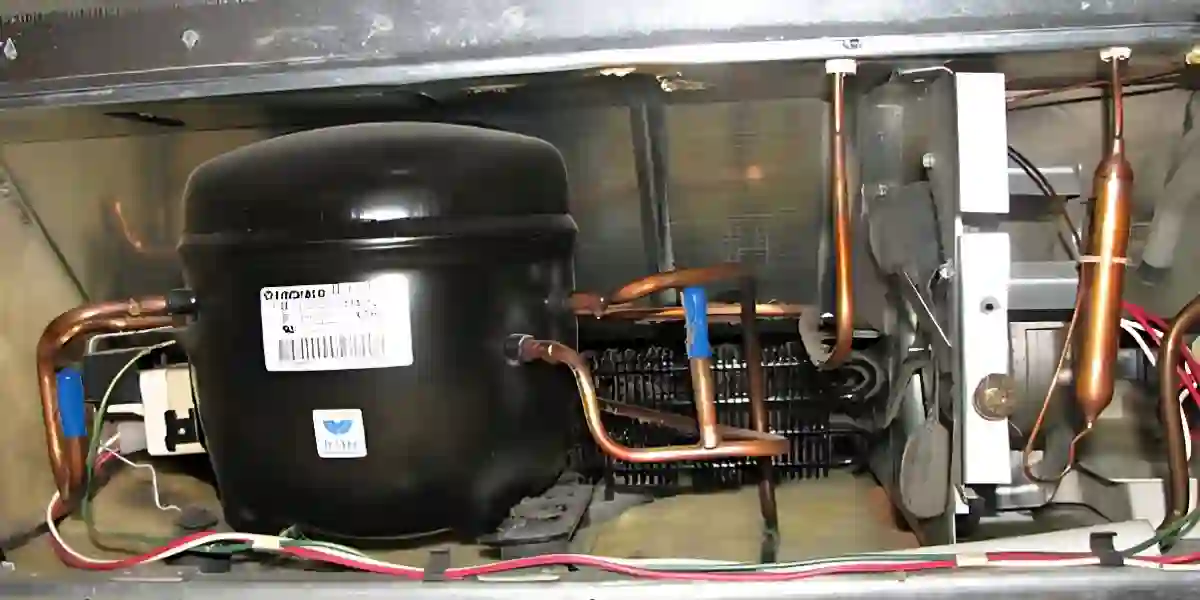
Begin by identifying the compressor within your refrigerator. You can find it at the back of the unit, near the bottom.
The compressor is a cylindrical or rectangular component that is often black in color.
Take a moment to visually inspect it and ensure it is accessible for further examination.
Power Off the Refrigerator
Before proceeding any further, it is crucial to turn off the power supply to your refrigerator.
Locate the power switch or unplug the unit from the electrical outlet. This precautionary measure is essential for your safety during the inspection process.
Put on Safety Gear
Safety should always be a priority when working with refrigeration systems.
Put on your safety goggles and insulated gloves to protect your eyes and hands from potential hazards.
This precaution will prevent injuries and ensure a smooth and secure exploration of the compressor.
Identify the Refrigerant Lines
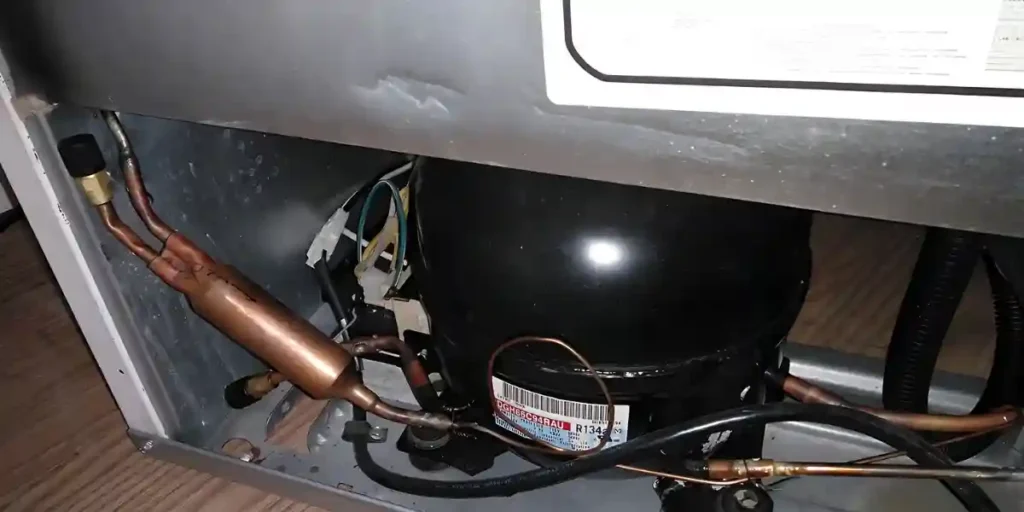
Next, identify the refrigerant lines connected to the compressor. These lines transport the refrigerant between different components of the cooling system.
Look for two distinct lines emerging from the compressor. One line is known as the high side, while the other is the low side.
Examine the Refrigerant Lines
Using your flashlight, carefully examine the refrigerant lines connected to the compressor.
Observe the pipes closely for any markings or labels that indicate which line is low.
Manufacturers often use color-coded labels or engravings to distinguish between the two lines.
Consult the Refrigerator Manual
If you are unable to locate clear markings on the refrigerant lines, refer to the refrigerator’s manual for guidance.
The manual may provide specific instructions or diagrams highlighting the low side of the compressor.
It is always beneficial to consult the manufacturer’s documentation to ensure accuracy.
Identify the Suction Line
The low side of the compressor is typically connected to a suction line, which carries the refrigerant in its gaseous state.
Look for a larger-diameter pipe among the refrigerant lines, as this is usually the suction line connected to the low side.
Trace the pipe from the compressor to confirm its connection.
Attach the Refrigerant Pressure Gauge
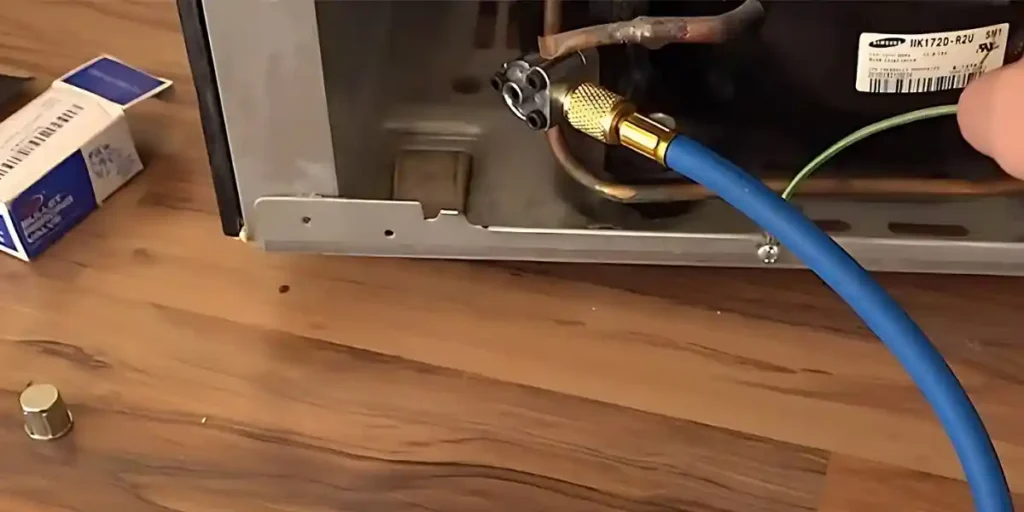
Connect the refrigerant pressure gauge to the suction line to confirm where the low side is.
Follow the instructions provided with the gauge to ensure a secure connection.
This gauge will allow you to measure the pressure and verify that you have found the low side correctly.
Read the Pressure
With the refrigerant pressure gauge securely attached to the suction line, observe the pressure reading.
Low side pressure should be less than high side pressure, indicating you have found the compressor’s low side.
Ensure that the pressure readings align with the manufacturer’s specifications.
Benefits of Identifying the Low Side of a Refrigerator Compressor
To ensure optimal refrigerator performance, you should locate the low side. Here are the key benefits:
Accurate Pressure Measurement:
The low side of the compressor is directly connected to the suction line, where refrigerant flows in its gaseous state.
The low side can be used to attach a refrigerant pressure gauge and obtain accurate pressure readings.
Monitoring the low side pressure is crucial for assessing the efficiency and performance of the refrigeration system.
Diagnostic Tool:
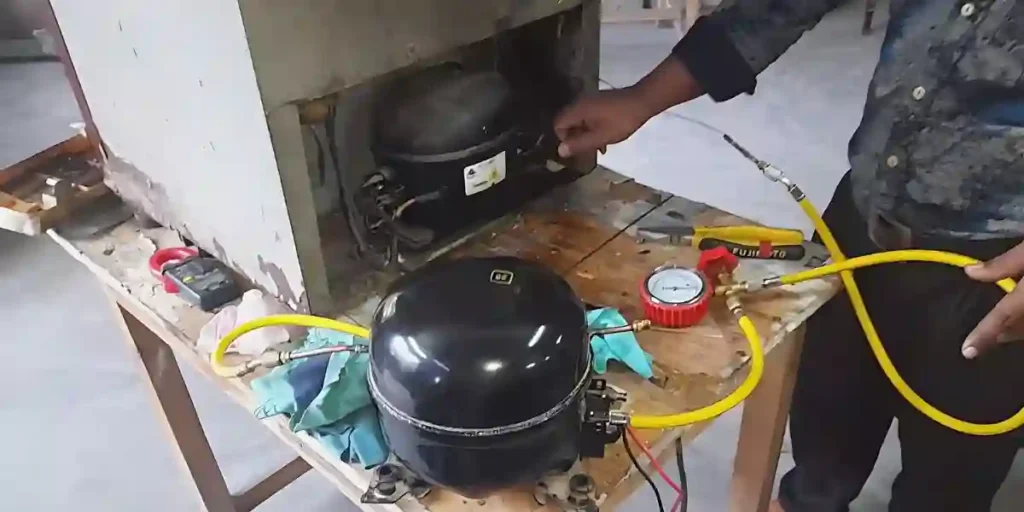
The low side pressure can serve as a diagnostic tool when troubleshooting refrigerator issues.
A low-side pressure reading may indicate a refrigerant leak, a blockage, or a faulty compressor.
By identifying the low side, you gain valuable information that can help pinpoint the underlying cause of malfunctions.
Refrigerant Charging:
The low side of the refrigeration system is crucial for proper circulation and distribution of refrigerant.
Charge refrigerant correctly to maximize cooling efficiency and prevent insufficient or excessive refrigerant issues.
Prevents Damage to the Compressor:
The compressor is a critical component of the refrigerator’s cooling system. Correctly identifying the low side prevents high-pressure conditions from damaging the compressor.
To maintain the compressor’s longevity, it is essential to maintain the correct pressure differential.
Efficient System Maintenance:
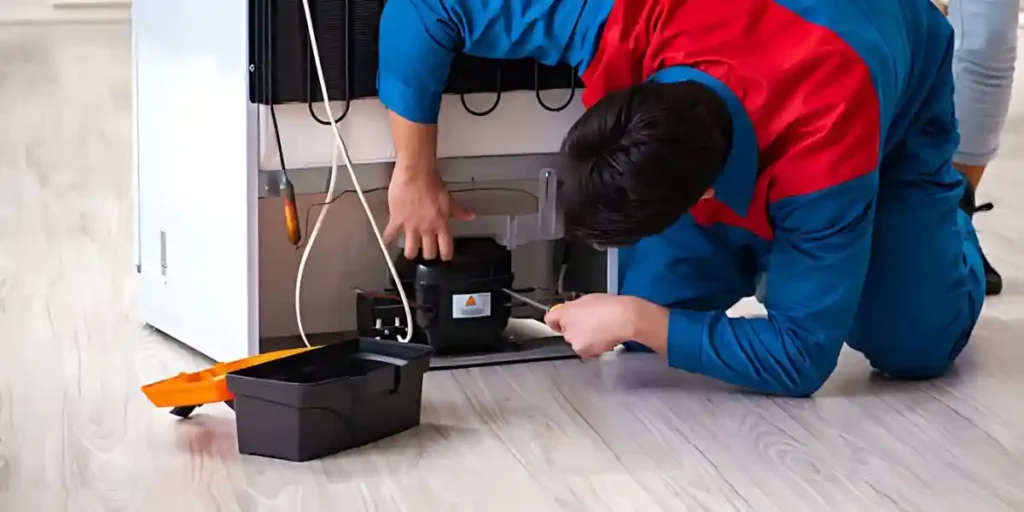
Refrigerator maintenance includes cleaning coils, inspecting components, and checking for leaks.
With the low side location known, you can focus on specific areas associated with the low side, such as the suction line.
This targeted maintenance approach saves time and effort, ensuring that the low side is functioning optimally.
Enhanced Safety:
Understanding the low side of a refrigerator compressor promotes safety during maintenance and repair activities.
Identifying the low side helps you avoid accidental contact with the high side. This knowledge helps prevent potential injuries and ensures a safer working environment.
Factors to Consider When Locating the Low Side
Here are the key factors to consider:
Manufacturer Documentation:
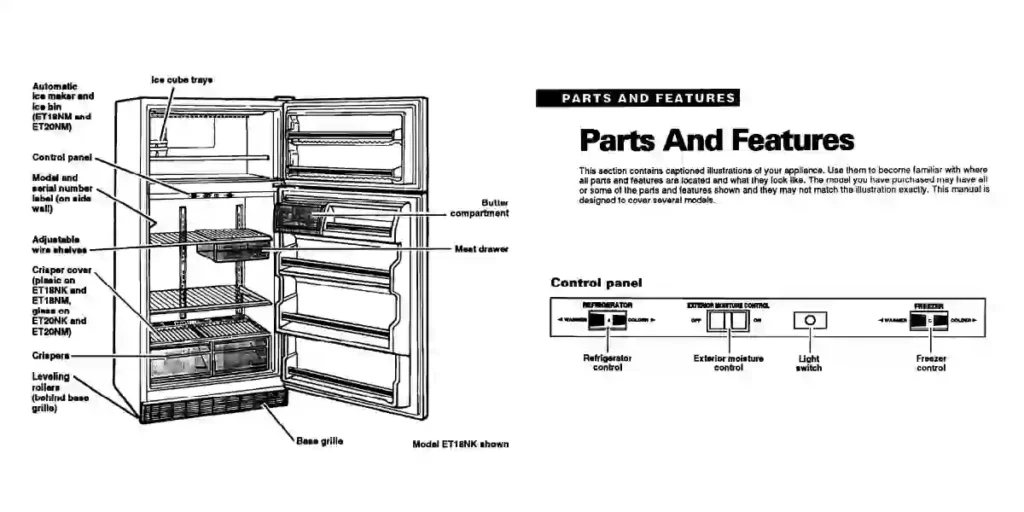
Consult the refrigerator’s manual or any manufacturer-provided documentation. Low-side locations are often highlighted in diagrams, labels, or specific instructions.
To distinguish the low from the high side of the compressor, manufacturers may use color coding or engraving.
Adhering to the manufacturer’s guidelines ensures accurate identification.
Visual Inspection:
Conduct a thorough visual inspection of the compressor and surrounding components.
Look for any visible markings, labels, or indicators that may indicate the low side. These markings can vary depending on the refrigerator model and manufacturer.
Be aware of the sizes and positions of any pipes or lines connected to the compressor, as the suction line is usually larger.
Refrigerant Line Connections:
Examine the refrigerant lines connected to the compressor. You will find two distinct lines emerging from the compressor: the high side and the low side.
The high side carries the refrigerant in its compressed state, while the low side handles the gaseous refrigerant.
Identify these lines and trace them to determine which one corresponds to the low side. Pay attention to any labels, markings, or color-coded indicators along the lines.
Safety Precautions:
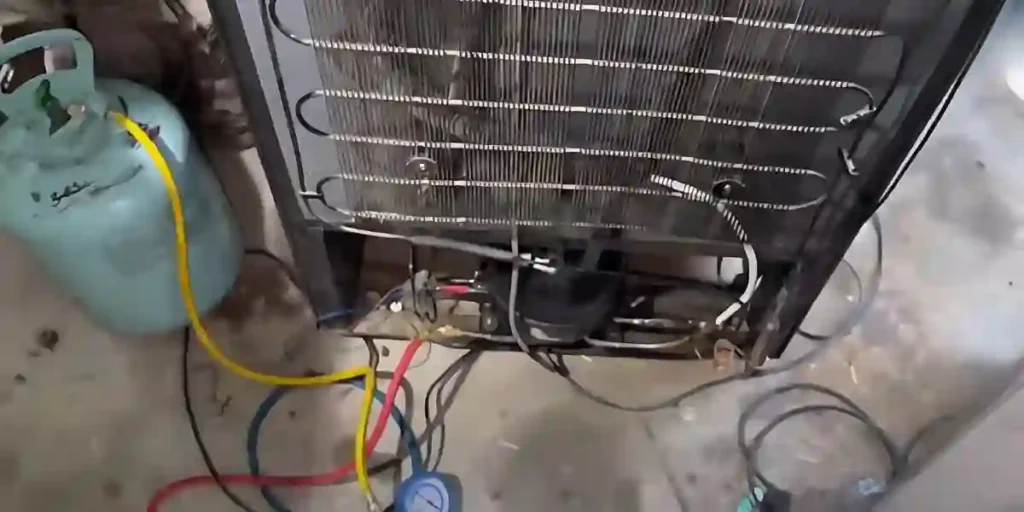
During the process of locating the low side, prioritize safety.
Make sure the refrigerator is unplugged. Wear appropriate safety gear, such as safety goggles and insulated gloves, to protect yourself from potential hazards.
These precautions minimize the risk of injury and allow you to work with confidence.
Refrigerant Pressure Gauge:
Utilize a refrigerant pressure gauge to confirm the identification of the low side.
Once you believe you have located the low side, securely attach the pressure gauge to the corresponding line.
The gauge will provide pressure readings that can be compared to manufacturer specifications.
Correctly interpreting the pressure readings ensures that you have indeed found the low side.
Professional Assistance:
If you encounter difficulties or uncertainties in locating the low side, consider seeking professional assistance.
Professionals who repair refrigerators have experience and expertise. They can accurately identify the low side and provide guidance or perform any necessary repairs or maintenance.
Common Symptoms of Low Side Issues in a Refrigerator Compressor
Here are some common symptoms to look out for:
Insufficient Cooling:
One of the primary symptoms of low-side issues is inadequate cooling or a noticeable decrease in cooling performance.
If the low side is compromised, the refrigerant may not circulate effectively, resulting in reduced cooling capacity.
The refrigerator may struggle to maintain the desired temperature, and food items may spoil more quickly.
Frost Buildup on Evaporator Coils:
If the low side is experiencing issues, you may observe an excessive buildup of frost or ice on the evaporator coils.
This occurs when the refrigerant is not properly evaporating in the evaporator coil due to low pressure on the low side.
As a result, refrigeration temperatures can fluctuate as a result of ice accumulation.
Constant Cycling or Short Cycling:
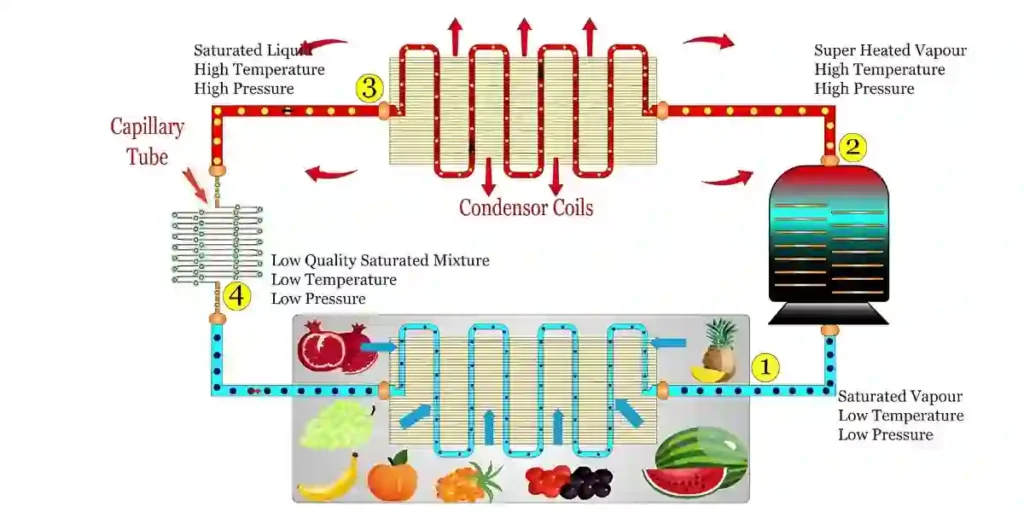
Low-side problems can cause the compressor to cycle on and off frequently or irregularly. This cycling behavior, known as short cycling, is often an indication of a refrigerant-related issue.
The compressor may cycle excessively when the low side pressure is incorrect. This can result in energy inefficiency and potentially damage the compressor over time.
Unusual Sounds:
A malfunctioning low side may produce unusual sounds within the refrigerator. You may hear hissing, gurgling, or bubbling noises, which can indicate refrigerant flow issues.
Refrigerant circulation may be disrupted by improper pressure differentials between the low and high sides.
High Energy Consumption:
Low side problems can lead to increased energy consumption by the refrigerator. The compressor has to work harder to achieve the desired cooling when the low side is compromised.
It’s possible that low side issues are causing a spike in your energy bills without any other obvious cause.
Warm or Hot Low Side Line:
While performing a visual inspection, if you notice that the low side line feels warm or hot to the touch, it may indicate an issue.
A properly functioning low side line should be cool or at ambient temperature. Increasing temperatures along the low side line may indicate a restriction or inadequate refrigerant flow.
Maintenance Tips for the Low Side of a Refrigerator Compressor
Inspect the Low Side Components
Begin by visually inspecting the low side components of your refrigerator compressor.
Look for any signs of damage, such as leaks, cracks, or loose fittings. Check the suction line, which connects to the low side, and make sure it is securely attached.
Clean the Suction Line and Coils
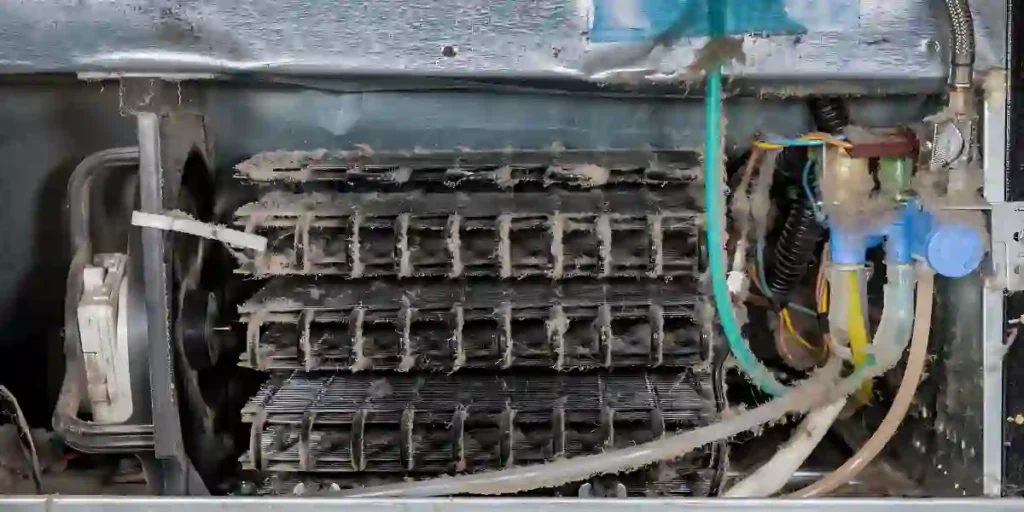
Cleanliness is crucial for optimal low side performance. Clean the suction line and condenser coils with a soft brush or a vacuum with a brush attachment.
This step helps maintain proper airflow and prevents potential restrictions on the low side.
Check Refrigerant Levels
Proper refrigerant levels are essential for efficient cooling. You should consult the refrigerator manual for your specific model’s refrigerant level.
For accurate measurement and recharge, seek professional assistance if you suspect low refrigerant levels.
Inspect for Refrigerant Leaks
Refrigerant leaks can negatively impact the performance of the low side and the overall cooling system.
Check the suction line, connections, and other components for leaks, such as oil stains, frost accumulation, and hissing.
If you detect a leak, it is recommended to contact a qualified technician to repair it promptly.
Verify Pressure Readings
Monitoring pressure readings on the low side provides valuable insights into the compressor’s performance.
Compare the low side pressure to the manufacturer’s recommended range with a refrigerant pressure gauge.
Deviations from the specified pressure range may indicate underlying issues that require further attention.
Lubricate Moving Parts
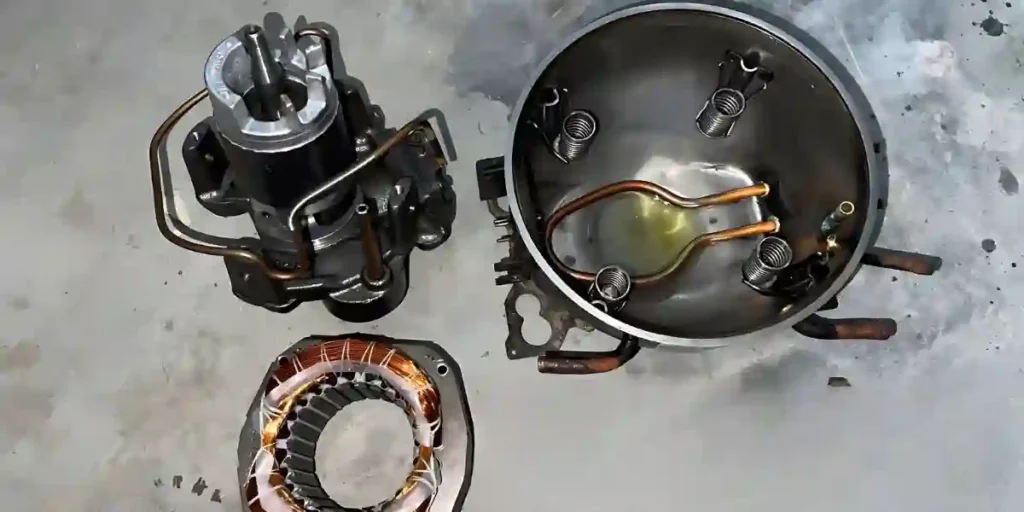
Periodically lubricate the moving parts associated with the low side, such as the compressor motor.
Consult the refrigerator manual for the appropriate lubricant type and application method.
Proper lubrication reduces friction and wear, extending the lifespan of the low side components.
Schedule Regular Maintenance
Implement a routine maintenance schedule for your refrigerator, including dedicated attention to the low side.
In regular maintenance, coils are cleaned, connections are checked, and refrigerant levels are verified.
Keeping a maintenance schedule can prevent major problems by identifying low side issues early.
Seek Professional Assistance if Needed
While DIY maintenance is beneficial, certain complex issues may require professional expertise.
It is recommended to seek the assistance of a qualified refrigerator technician if you have persistent low side problems.
They possess the knowledge and tools to diagnose and resolve more intricate low side issues.
FAQs
Can I Rely On Markings Or Labels To Identify The Low Side?
Look for indicators such as “Low Side” or arrows pointing towards the low side. These markings provide a reliable way to locate the low side of the compressor.
What If I Can’t Find Clear Markings On The Refrigerant Lines?
These resources often contain specific instructions or diagrams highlighting the low side. Based on your refrigerator’s model and make, they may provide additional guidance.
How Can I Confirm If I’ve Found The Low Side Correctly?
Once connected, you can observe the pressure reading on the gauge.
The low side pressure should be lower than the high side pressure, indicating that you have indeed found the low side.
Conclusion
Discovering the low side of your refrigerator compressor is key to ensuring optimal performance.
Inspect the larger-diameter suction line visually and use markings as guides to locate it accurately.
Measure pressure, diagnose issues, and maintain efficient cooling with the right tools.
Take charge of your refrigerator’s well-being by confidently finding the low side and keeping it in check.