Curious why your KitchenAid refrigerator isn’t cooling properly while the freezer is frosty?
Let’s embark on a chilly expedition and unravel the mystery behind this appliance enigma. From blocked vents to faulty fan motors, we’ll uncover the clues that will bring back the coolness to your kitchen.

Kitchenaid Refrigerator Not Cooling But Freezer Is Fine
Is your KitchenAid refrigerator not cooling, but the freezer is fine? The issue might lie in blocked vents, hindering airflow between the compartments.
Additionally, a faulty condenser fan motor can affect cooling. Check for obstructions in the fan blade and ensure it spins freely. Consider replacing the condenser fan motor if necessary.
Reasons And Effective Fixes of a Kitchenaid Refrigerator Not Cooling
Regular Maintenance and Safety Precautions
Perform regular maintenance to ensure optimal performance and longevity of your refrigerator. Before attempting any fixes, follow these safety precautions to avoid electrical hazards:
- Power down the fridge by either unplugging it or switching off the circuit breaker.
- If the fridge is pulled away from the wall or the power switch is easily accessible, remove the plug.
- If the power switch is not easily accessible, locate the fridge’s circuit breaker in your breaker box and turn off the circuit.
- Verify that the fridge has lost power by opening the doors and checking if the lights inside turn on.
- Wear gloves when working underneath the fridge to avoid cuts from sharp sheet metal.
Reset Power
If your refrigerator has experienced a temporary power outage, it may enter a safe mode. To reset the power and trigger a cooling cycle, follow these steps:
- Unplug your refrigerator or switch off the circuit breaker.
- Wait for approximately 5 minutes before restoring power to the fridge.
- After restoring power, open the freezer and push the light switch three times to initiate a cooling cycle.
- Monitor the temperature over the next 24 hours to see if the cooling issue is resolved.
Verify Power Supply
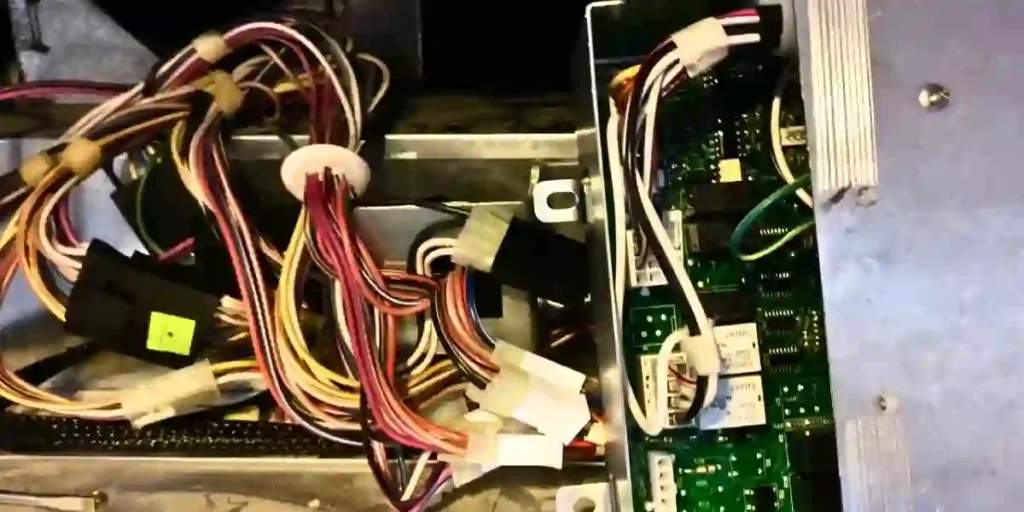
Ensure that your fridge is receiving power by checking the exterior control lights or interior lights:
- Check if the interior lights or control lights of the fridge are illuminated.
- If you observe flickering lights or burnt-out bulbs, it indicates a power issue.
- If there seems to be no power, check the electrical breaker and reset it if necessary.
- Additionally, locate the GFCI outlet and reset it to eliminate any power-related issues.
- If the fridge still has no power after trying another outlet, there might be an electrical problem. Contact an electrician or appliance technician for assistance.
Proper Fridge Location
The location of your refrigerator plays a crucial role in its cooling efficiency:
- Refrigerators perform best when kept at temperatures around 70 degrees Fahrenheit (21 degrees Celsius) inside a home.
- Avoid placing the fridge in unheated garages where the temperature drops below 36 degrees Fahrenheit (2 degrees Celsius), as this can lead to shutdown and ineffective cooling.
- Ensure that the fridge is not exposed to direct sunlight, warm rooms, or hot appliances like dishwashers, ranges, and ovens, as they can hinder proper cooling.
- Separate the fridge from heat sources and use fans to promote airflow in the room, aiding in cooling.
Proper Loading and Ventilation
Improperly loading or overloading the fridge can obstruct airflow and impact temperature regulation:
- The evaporator fan circulates cold air around the freezer, ensuring efficient cooling. It is essential to load the freezer with the right amount of food to prevent blocking the vents.
- Maintain enough food to fill the freezer, leaving approximately an inch of space between the food and the walls to prevent frost buildup and ensure proper airflow.
- Locate the evaporator fan and rearrange frozen items if they are too close, blocking the fan’s operation.
- Unblock the vents to facilitate airflow between the freezer and refrigerator compartments.
Check Thermostat Setting
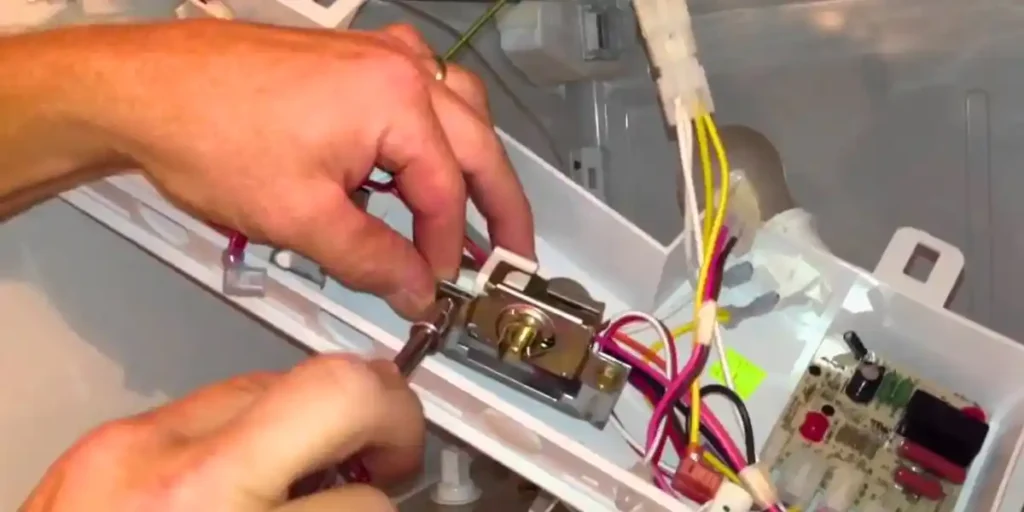
The thermostat setting is crucial for maintaining the desired temperature inside the fridge:
- Locate the knob or dial that sets the temperature and ensure it is set to the cold position.
- Verify that the thermostat hasn’t been bumped or shifted from its correct position.
- The fridge temperature should be set below 40 degrees Fahrenheit (4 degrees Celsius) but above 35 degrees Fahrenheit (2 degrees Celsius).
- If your fridge doesn’t have a digital thermostat display, use a thermometer to check the temperature accuracy.
Clean Condenser Coils
Dirty condenser coils can reduce the fridge’s efficiency and force the compressor to work harder to cool the unit:
- Pull your fridge out from the wall to access the condenser and its coils located at the backside and bottom.
- Some fridges may have an anti-tip bracket that requires pulling straight out from the wall to remove.
- Use a stiff brush and a vacuum to clean dust and debris off the condenser coils and the fan.
- Be cautious while cleaning to avoid bending or damaging the coils and tubes.
- Return the fridge to its original position once the cleaning is complete.
Leveling the Fridge
An unlevelled fridge can impact its functionality and cooling effectiveness:
- Use a bubble level to check for side-to-side imbalance.
- Adjust the front feet of the fridge to correct any wonkiness and ensure proper leveling.
- Slightly tilt the fridge back to allow the doors to close on their own and prevent issues with the ice maker.
- Proper leveling improves efficiency and prevents cooling problems.
Inspect and Replace Failing Door Seals
Faulty door seals can lead to cool air leakage, hindering the fridge’s cooling ability:
- Inspect the door seals (gaskets) for any signs of wear, damage, or gaps.
- Clean the seals and remove any debris that might obstruct proper sealing.
- If the seals are damaged or worn out, replace them with new ones to ensure a tight seal and prevent air leakage.
Check and Replace Faulty Fan Motors
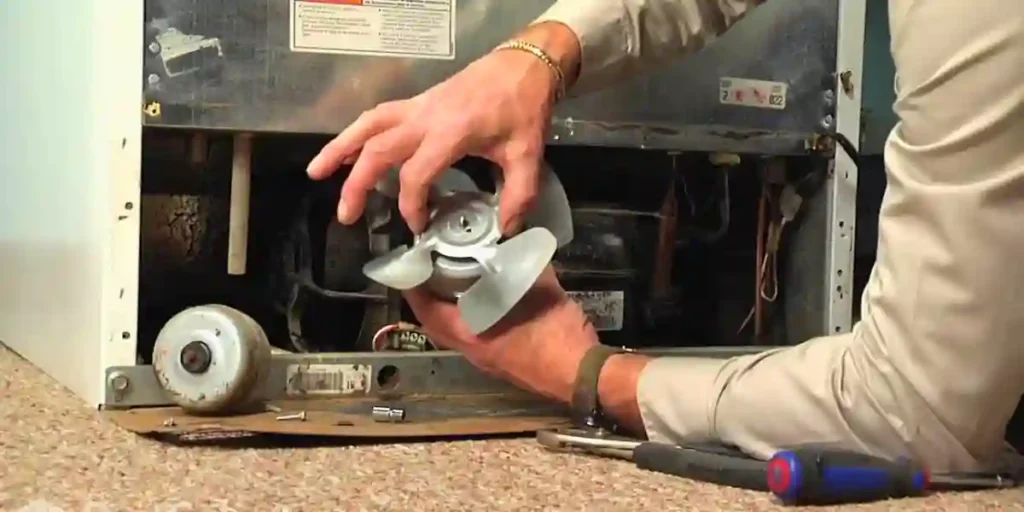
Both the condenser fan motor and evaporator fan motor are crucial for proper cooling. If either motor is defective, it can impact the fridge’s cooling performance:
1. For the condenser fan motor:
- Turn off the power and access the motor, usually located at the bottom of the fridge.
- Try manually rotating the fan to ensure it moves freely and check for any obstructions.
- Use a multimeter to test the motor’s continuity. If the motor fails the test, it’s time to give it a replacement.
- If the fan can rotate freely and passes the continuity test, move on to checking the evaporator fan.
2. For the evaporator fan motor:
- Turn off the power and locate the fan inside the freezer.
- Check if the fan can rotate manually without any obstructions.
- Use a multimeter to test the motor’s continuity. If the motor fails the test, it’s time to give it a replacement.
- If the fan can rotate freely and passes the continuity test, move on to other possible causes.
Test and Replace Faulty Components: Start Relay, Thermostat, Start Capacitor
Several components, such as the start relay, thermostat, and start capacitor, can affect the fridge’s cooling performance. Test and replace as needed:
1. For the start relay:
- Turn off the power and locate the start relay, often mounted on the side of the compressor.
- Use a multimeter to test the relay for continuity. If it fails the test, it’s time for a replacement.
- If the relay passes the test, move on to checking the temperature control thermostat.
2. For the temperature control thermostat:
- Turn off the power and locate the thermostat, usually found inside the fridge.
- Check if you can manually adjust the thermostat from the lowest to the highest setting, listening for a clicking sound at the highest setting.
- Use a multimeter to test the thermostat for continuity. If it fails the test, it’s time for a replacement.
- If the thermostat passes the test, move on to checking the start capacitor.
3. For the start capacitor:
- Turn off the power and locate the start capacitor, often near the compressor.
- Use a multimeter to test the capacitor for continuity. If it fails the test, it’s time for a replacement.
- After replacing any faulty components, check if the fridge now cools properly. If not, continue to check the thermistor and compressor.
Test and Replace Faulty Thermistor and Compressor
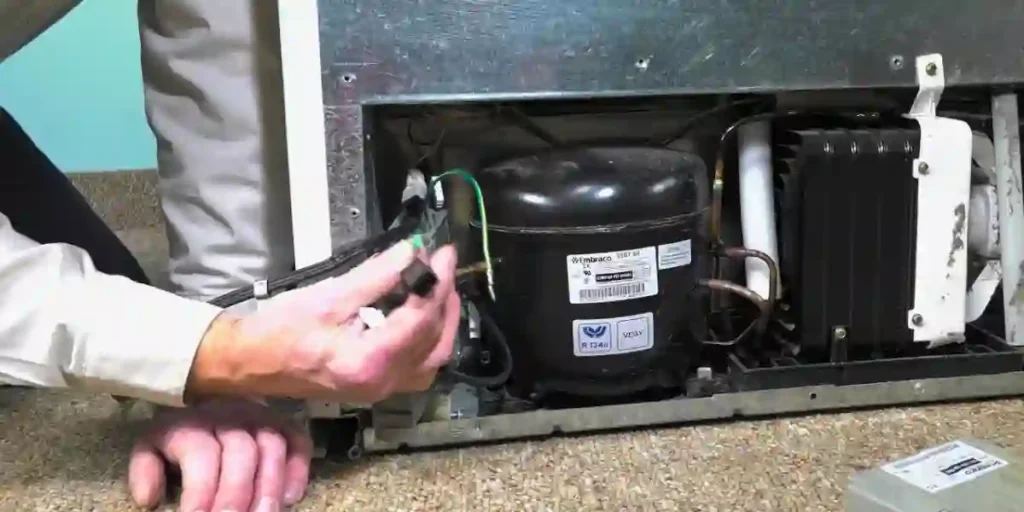
The thermistor and compressor are critical components of the cooling system. Test and replace if necessary:
1. For the thermistor:
- Turn off the power and locate the thermistor, usually connected to the control board.
- Use a multimeter to test the thermistor for continuity. If it fails the test, it’s time for a replacement.
- After replacing the thermistor, check if the fridge now cools properly. If not, move on to checking the compressor.
2. For the compressor:
- Turn off the power and locate the compressor at the back of the fridge.
- Use a multimeter to test the compressor for continuity. If it fails the test, it’s time for a replacement.
- If the compressor passes the test, consider replacing the main control board if the fridge still doesn’t cool properly.
Consider Refrigerant Leak and Main Control Board Failure
If none of the previous fixes resolves the cooling issue, you should consider the following possibilities:
1. Refrigerant Leak:
- Contact a service technician to inspect and refill or replace the coolant or compressor.
- Note that this may result in replacing the entire fridge, depending on the cost of repairs.
2. Main Control Board Failure:
- Although uncommon, a defective main control board can cause cooling problems.
- Check the defrost system, cooling fans, and cooling controls before considering replacing the control board.
In some cases, replacing certain components or even the entire fridge might be more cost-effective than repairing individual parts.
Consider the age and overall condition of your Kitchenaid refrigerator when making such decisions.
Regular Maintenance Tips For Optimal Kitchenaid Refrigerator Cooling
Cleaning the Exterior
Wipe Down The Surface:
Use a soft cloth dampened with mild detergent and warm water to wipe the exterior surface of your KitchenAid refrigerator.
This helps remove dust, dirt, and fingerprints, keeping it looking clean and shiny.
Avoid Abrasive Cleaners:
Avoid using harsh chemicals or abrasive cleaners, as they can damage the refrigerator’s finish.
Stick to gentle cleaning solutions to protect the exterior from scratches or discoloration.
Clean The Handles:
Pay attention to the handles, as they are often touched with greasy or dirty hands. Use a mild cleaner and a cloth to wipe away any residue, ensuring the handles stay clean and hygienic.
Interior Cleaning
Remove Expired Food:
Regularly check your refrigerator for expired or spoiled food items. Discard any items that have passed their expiration date or show signs of spoilage.
This prevents unpleasant odors and maintains a clean environment.
Wipe Spills Immediately:
If you notice any spills or leaks inside the refrigerator, clean them up promptly. Use a mild cleaning solution and a cloth to wipe away the spills, preventing the growth of bacteria or mold.
Clean Removable Parts:
Remove any shelves, drawers, or bins that are dishwasher-safe. Wash them with warm water and mild detergent, ensuring they are thoroughly dry before placing them back in the refrigerator.
Airflow and Temperature Regulation
Maintain Proper Airflow:
Ensure that the vents inside the refrigerator are not blocked by food items.
Proper airflow allows the refrigerator to cool efficiently and prevents uneven temperature distribution. Rearrange items if needed to optimize airflow.
Check And Adjust Temperature Settings:
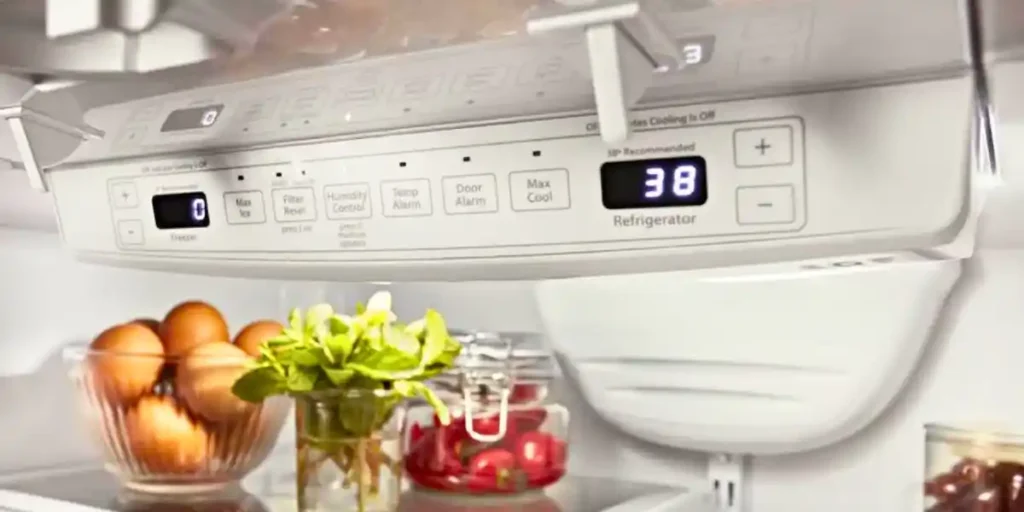
Periodically check the temperature settings of your KitchenAid refrigerator to ensure it is set to the recommended level.
Refer to the user manual for specific instructions on adjusting the temperature settings.
Condenser Coils and Filters
Clean The Condenser Coils:
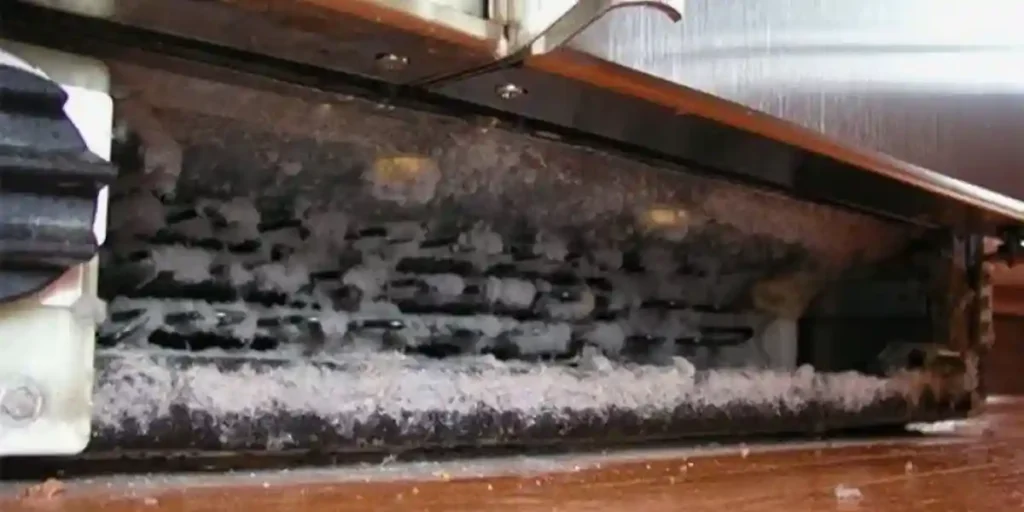
Over time, dust and debris can accumulate on the condenser coils, reducing their efficiency.
Turn off the refrigerator and gently vacuum or brush the coils to remove any buildup. This helps the refrigerator cool more effectively.
Replace Or Clean The Air Filter:
Some KitchenAid refrigerators have air filters that need regular maintenance. Refer to the user manual to locate the air filter and follow the instructions for cleaning or replacing it.
This helps maintain fresh, odor-free air circulation inside the refrigerator.
Door Seals and Gaskets
Check Door Seals For Tightness:
Inspect the door seals or gaskets to ensure they are intact and free from cracks or tears.
Damaged seals can allow cool air to escape, affecting the refrigerator’s cooling efficiency. If needed, replace the seals according to the manufacturer’s instructions.
Clean Door Seals:
Clean the door seals regularly with mild detergent and warm water. This removes any dirt or food particles that may have accumulated, ensuring a proper seal when the door is closed.
Regular Defrosting
Defrost Freezer As Needed:
If your KitchenAid refrigerator has a freezer section, it may require periodic defrosting to maintain optimal cooling.
Follow the instructions in the user manual to defrost the freezer and remove any ice buildup. This helps the refrigerator operate efficiently.
Energy Efficiency

Keep Refrigerator Away From Heat Sources:
Ensure that your KitchenAid refrigerator is placed away from direct sunlight, heat sources, or appliances that generate heat.
Excessive heat can strain the refrigerator’s cooling system and increase energy consumption.
Check Door Seals For Tightness:
Inspect the door seals or gaskets to ensure they are intact and free from cracks or tears.
Damaged seals can allow cool air to escape, forcing the refrigerator to work harder to maintain the desired temperature.
Avoid Overloading The Refrigerator:
Avoid overloading the refrigerator with too many items, as this can obstruct airflow and strain the cooling system. Organize your items to maximize space and maintain proper ventilation.
FAQs
What Should I Do If My Refrigerator Is Not Cooling Properly?
Start by checking the condenser coils for dust or debris buildup, as this can affect cooling performance. Clean the coils if necessary.
Additionally, ensure proper airflow around the fridge and check the door seals for any gaps. Adjusting the thermostat setting and avoiding overloading the fridge can also help.
How Can I Troubleshoot A Faulty Evaporator Fan?
First, locate the evaporator fan inside the freezer and check if it is obstructed. Manually spin the fan to ensure it moves freely.
If the fan is blocked or does not spin properly, it may need cleaning or replacement.
A faulty evaporator fan can cause cooling issues in the refrigerator compartment.
What Should I Do If The Condenser Coils Are Dirty?
Dirty condenser coils can reduce the cooling efficiency. To clean them, disconnect the power and carefully vacuum or brush off any dust or debris from the coils.
Be gentle to avoid bending the coils or damaging any components. Cleaning the coils can improve the fridge’s cooling performance.
How Can I Determine If The Thermostat Setting Is Correct?
Locate the thermostat dial or digital display inside the fridge and ensure it is set between 35 to 40 degrees Fahrenheit (2 to 4 degrees Celsius).
If the setting has been accidentally changed or bumped, adjust it to the recommended temperature range. Use a thermometer to verify the actual temperature inside the fridge.
What Could Be Causing A Faulty Door Seal?
Door seals can wear out over time, causing cool air to escape. Common causes of faulty door seals include dirt buildup, damage, or misalignment.
Inspect the seals for any gaps or tears and clean them regularly. If the seals are damaged, consider replacing them to maintain proper cooling.
This guide covers all major KitchenAid refrigerator models, including:
KSF26C4XYY03, KSCS25INSS01, KSCS25INSS00, KSCS25FKSS02, KSC24C8EYY02, KRSF505ESS00, KRSC503ESS00, KRMF706ESS01, KRMF706ESS00, KRFC302ESS00, KRFC300ESS01, KFCS22EVMS8, KFCS22EVMS4, KBFS22EWMS9, KBFS20EVMS13, 4KSRS22QAA01, 4KSRF42DTX2, 4KSRF36DTX2, 4KSRF36DTX1, 4KSRF22DTW00, and 4KFRF19MTW00.
Conclusion
If your KitchenAid refrigerator is not cooling, but the freezer is fine, several factors could be causing the issue.
Blocked vents can hinder airflow, while a faulty condenser fan motor may affect cooling. Check for obstructions in the fan blade and ensure it spins freely.
If necessary, consider replacing the condenser fan motor. Regular maintenance, such as cleaning condenser coils, checking thermostat settings, and inspecting door seals, can also contribute to optimal refrigerator cooling.
Remember to follow safety precautions and consult a professional if needed.
